 |
| Fairy from www.neopets.com |
But since fairies are extinct species in modern cities, and you might also get a mindfuck from ecologists for catching and killing them, I'd like to suggest you a modern way. Artificial like most modern food, drinks, clothes, furniture, feelings etc.
You'll need:
- a very hard type of fabric (I used pieces of an old shirt ironed on a special glue-stained buckram base)
- hairclips (I prefer those for hair extensions)
- crafting glue
- needle and thread of a color that matches your fabric
- acrylic paint
- lace
- ribbons, sparkles, glitter, flowers, beads...anything you'd like to see on the wings ^_^

Choose the shape you like most of all and draw it on a piece of paper. Place it on your hard fabric and outline the shape on it. Cut out what you got. Here are mine:

Sew the hairclips to the wing-shaped things - the smaller the stitches are, the better, but still they have to be reliable - unless you want the wings-clips to fall apart when you try to put them on. If the stitches don't turn out perfect (mine also didn't since the fabric was hellishly hard to pierce), no one will die - they'll later be covered in lace and paint.
 |
| The back side of the wings with a sewn-on clip. |
The stitches are still visible, and it's time to cover them up. Get your paint and lace out and be sure you don't have a cat in the room. You might leave it there if you want an exclusive paw print on your wings.

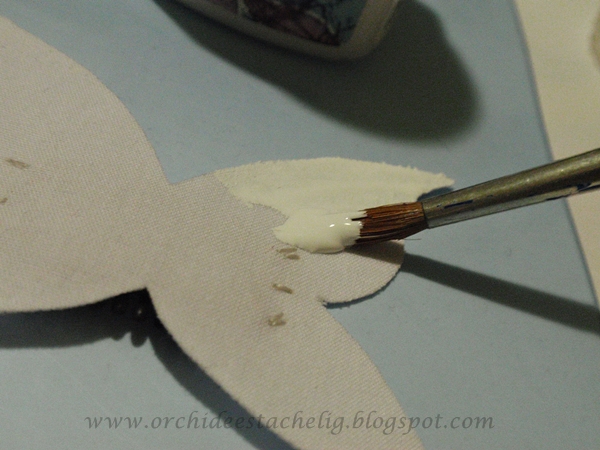
Let it dry for a VERY short time and press a piece of lace right on the painted wing. The edges will be accurately cut on the next day, they shouldn't be perfect for now. :)

Leave it alone so that the lace gets glued to the paint. Here's what it looks like after this stage is over:

 |
| Wet |
 |
| Dry - like the best of diapers XDD |
And now the fun part! Prepare the craziest decorations of all you have and let's start. =)

But I had already started, and managed to shape the ribbon with both eyebrow tweezers and my own claws. First glue is applied on the edge of the wing, and then ribbon is slowly pressed over it. I cut it to the perfect length after it dried a little. Still I had to make the sharp angles neater on the next day when it all was completely dry.


Look what I've come up with!

 |
| www.valshevchenko.com |
And don't forget to show me the wings you made! (or pulled out :P)
No comments:
Post a Comment